
Introduction
Due to the consecutive security holes discovered in Java 7, you have been able to notice how JDK version has been upgrading month after month this year 2013. The latest release you can find at the moment that this post has been made is JDK SE 7u21.

Otherwise, when you install NetBeans, the installer looks for the right distribution of JDK available in your computer and references it as the Default Java Platform. This will be the default JDK and you will not be able to change it from NetBeans UI, even if you uninstall that JDK and turn to install another newer version again.
Of course, in order to setup the Default Java Platform you can uninstall NetBeans and turn to install it again. But usually, this is not a good idea.
Creating a new Java Platform profile
Of course, you can work in NetBeans with several JDK if you have them installed into your machine. You only have to create a Java Platform profile for each one.
To do so, in NetBeans, go to Tools menu and select Java platforms.

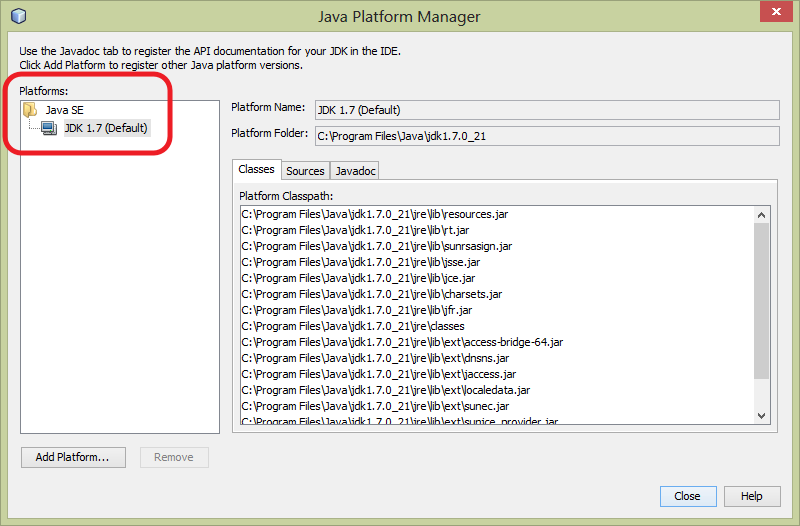
In the opening dialog do click on the Add Platform… button.

In the opening window navigate to the folder where the JDK you want to add is installed, select it and click on the Next button.

In the next window write a name for the platform. Revise Javadoc and Sources location folders and do click on the Finish button.

Notice how you have a new Java Platform now.

When you press the Close button, the new profile will be ready to use.
Changing the Default Java Platform
You can have inside your NetBeans any number of Java Platforms. This could be useful if you want to test the behavior of your programs under several Java Platforms. But only one of them can be the Default Java Platform. To change your Default Java Platform, follow the next instructions.
- Close your NetBeans if it is running.
- Use your files browser to open the folder:
C:\Program Files\NetBeans 7.3\etc
- Locate and edit the file:
netbeans.conf
- About the bottom of it, look for the option:
netbeans_jdkhome
- You will see something like this. In this example the Default Java Platform is Java SE 7u17 x64.
netbeans_jdkhome="C:\Program Files\Java\jdk1.7.0_17"
- Change the value according to the version you want to select. Be careful, type exactly the right folder name where the target version is. In this example you are going to select Java SE 7u21 x64, so this option will keep something like:
netbeans_jdkhome="C:\Program Files\Java\jdk1.7.0_21"
- Save the file and start NetBeans again.
As they say in France… et voilà!
Well done, nice work!
Regards.

Debe estar conectado para enviar un comentario.